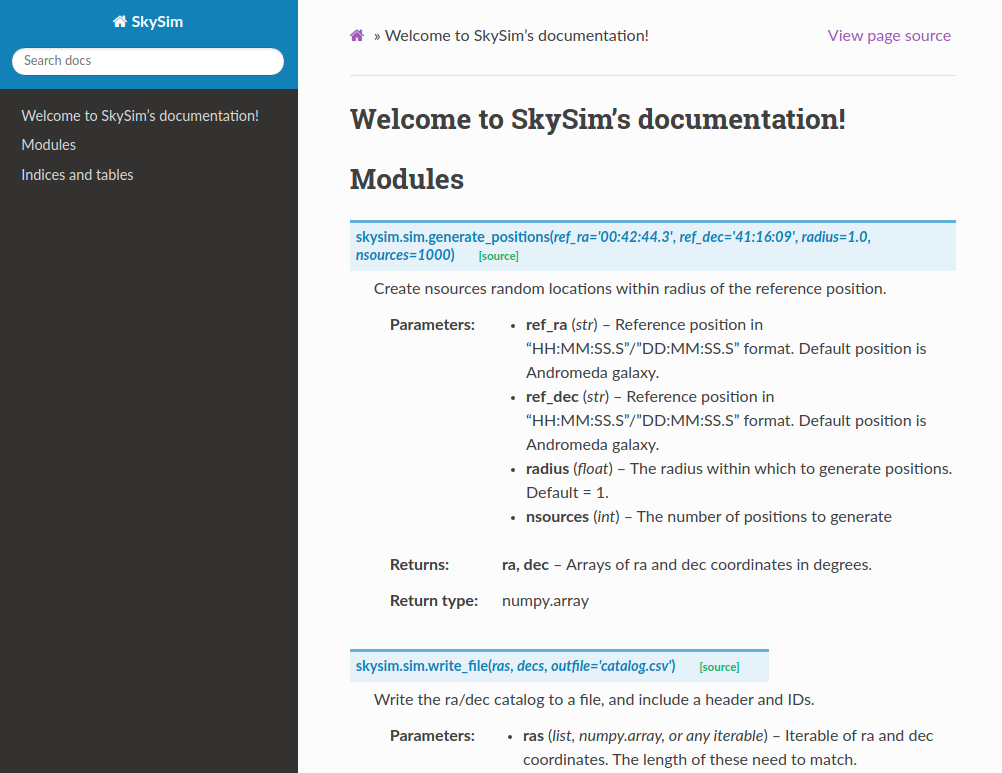
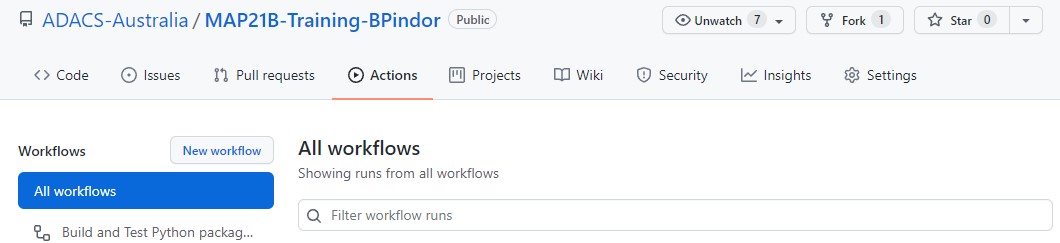
Image 1 of 1: ‘The new workflow button on the actions page of your github repository’
The new workflow button on the actions page of
your github repository
Figure 2
Image 1 of 1: ‘Python workflow templates available on Github’
Python workflow templates available on
Github
Figure 3
Image 1 of 1: ‘A completed workflow on the actions page’
A completed workflow on the actions page
Figure 4
Image 1 of 1: ‘Details of the workflow’
Details of the workflow
Figure 5
Image 1 of 1: ‘The new workflow button on the actions page of your github repository’
 The New workflow button will take you to a page to choose
a template from a long list. Last time we started with a pre-made
template for building and testing python code. This time we are going to
start with a generic template so we should click on the “set up a
workflow yourself ->” link.
Figure 6
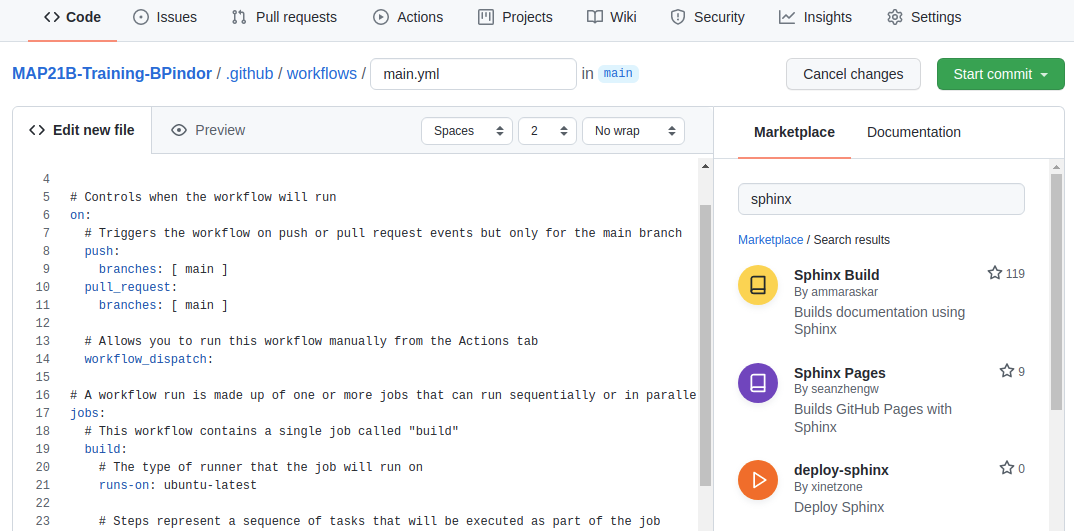
Image 1 of 1: ‘Choosing the sphinx build workflow from the marketplace’
 When
we click the “Sphinx Build” result we get the following snippet of code.
Which we can include in our workflow file.
Figure 7
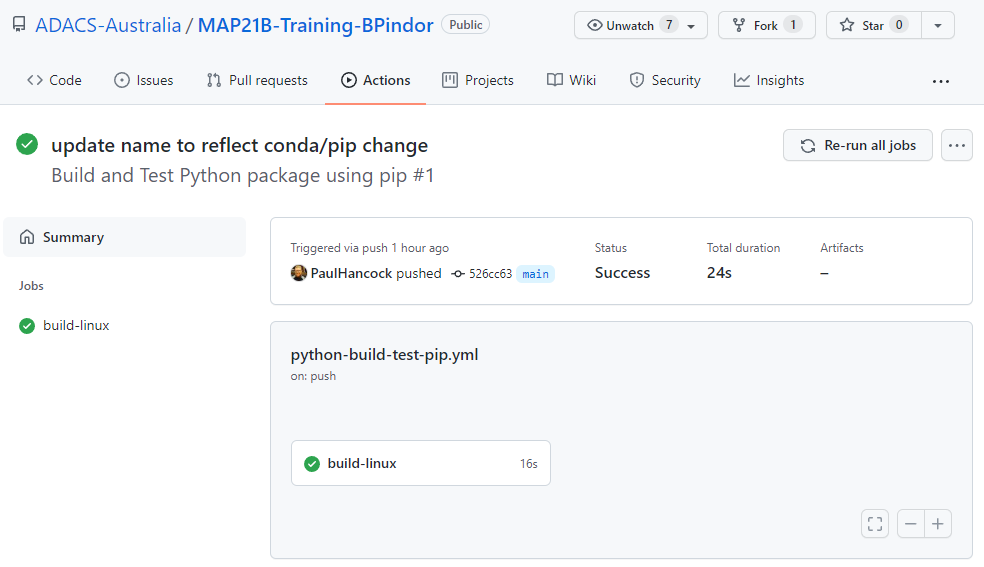
Image 1 of 1: ‘Successfully run documentation workflow’
 The good news is that
the documentation built without error. The bad news is that I can’t see
the documentation to ensure that it’s actually useful. Note in the above
image that there are three notes following our job: Status, Total
duration, and Artifacts. Artifacts are files that are retained after a
job completes. By default there are no artifacts, but we could modify
our workflow so that the documentation is part of the artifacts.
Figure 8
Image 1 of 1: ‘A successful workflow which has produced and artifact’
 We can
click on the documentation-html link to get a zip of the
docs/build/ directory which contains all our
documentation.
 Image credit: https://startinfinity.com/project-management-methodologies/waterfall
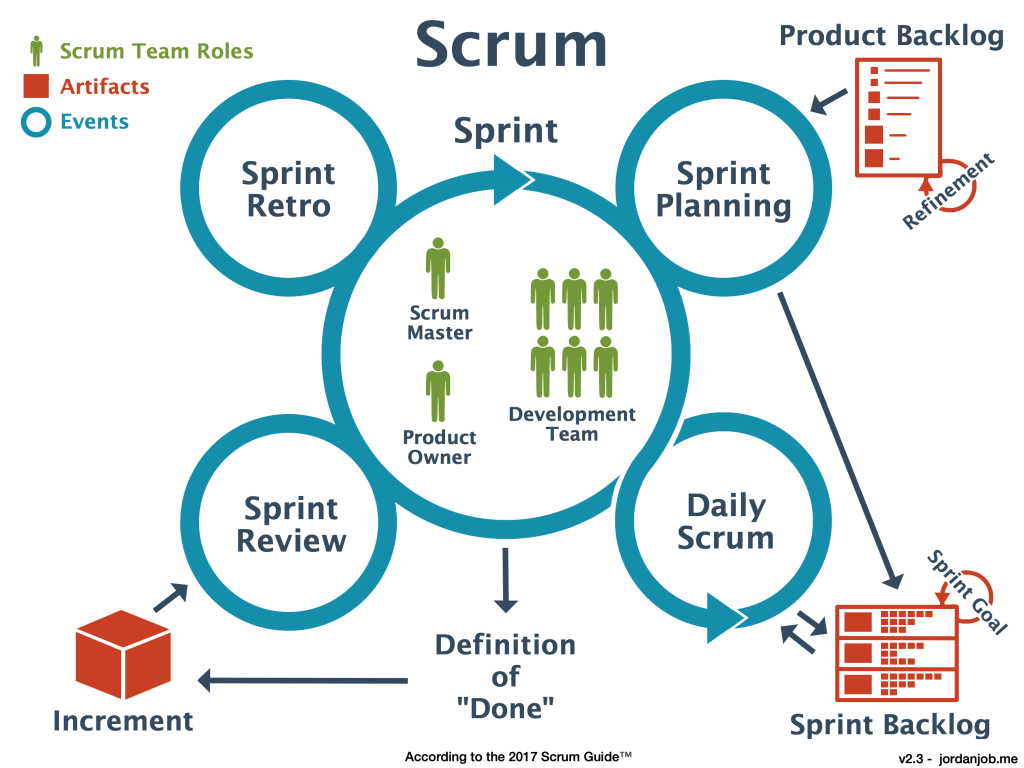 Image credit: https://jordanjob.me/blog/scrum-diagram/
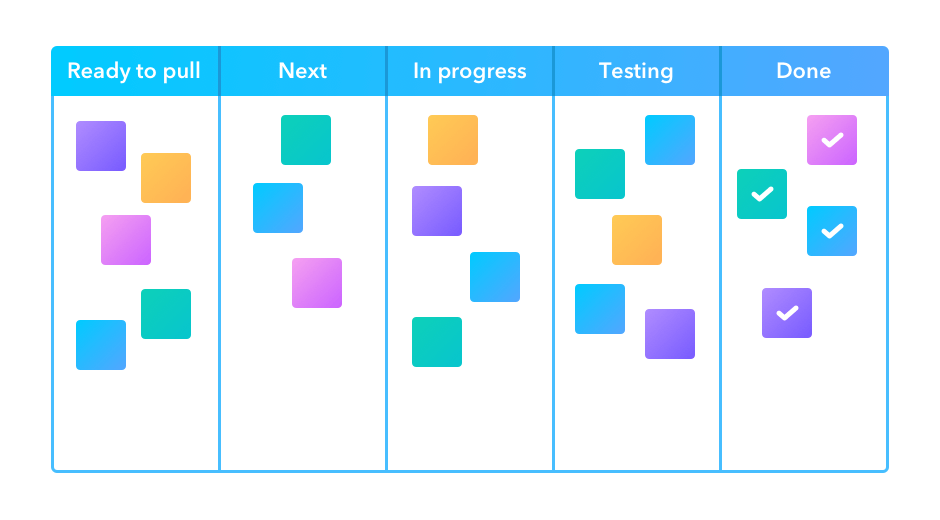 Image
credit: https://startinfinity.com/project-management-methodologies/kanban
Image
credit: https://startinfinity.com/project-management-methodologies/kanban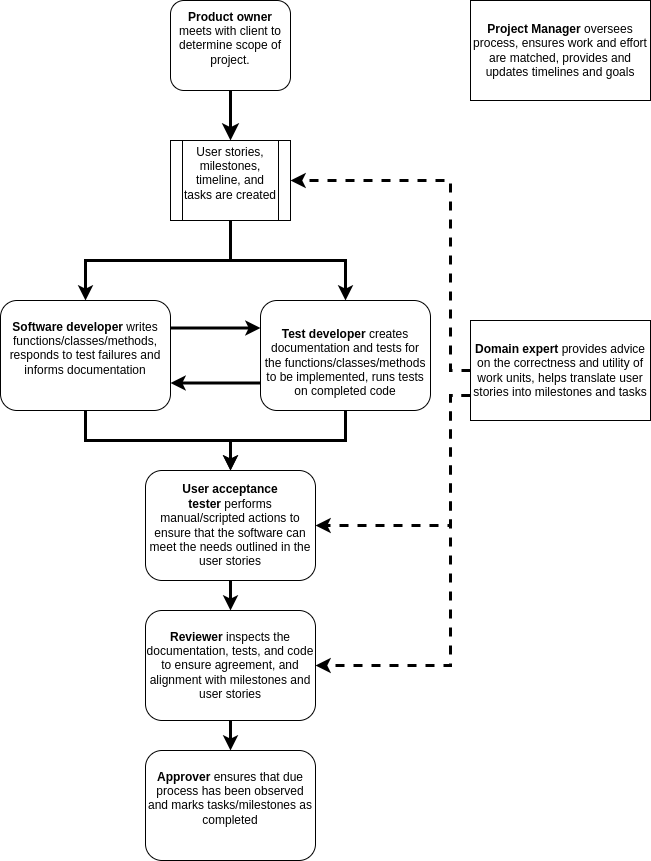


  When
we click the “Sphinx Build” result we get the following snippet of code.
Which we can include in our workflow file.
 When
we click the “Sphinx Build” result we get the following snippet of code.
Which we can include in our workflow file.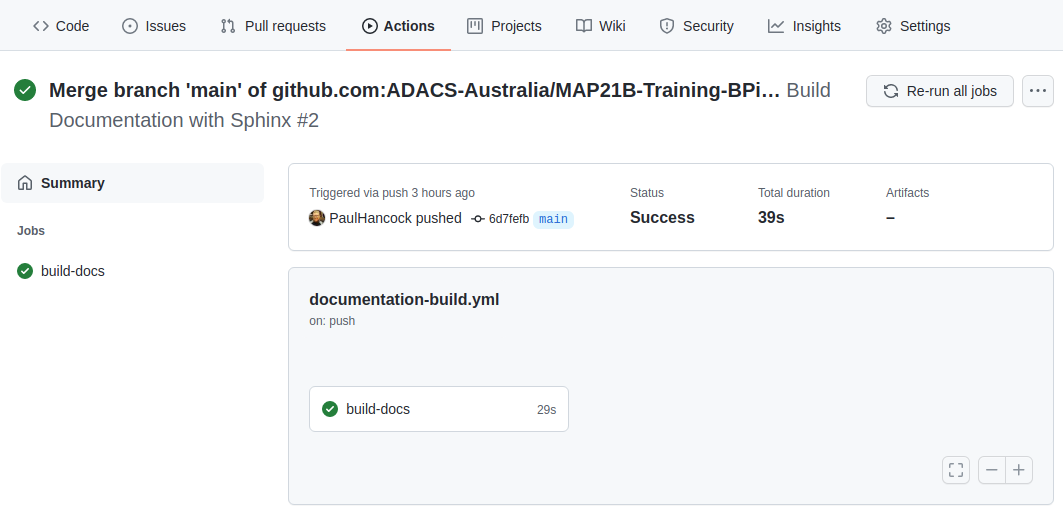  The good news is that
the documentation built without error. The bad news is that I can’t see
the documentation to ensure that it’s actually useful. Note in the above
image that there are three notes following our job: Status, Total
duration, and Artifacts. Artifacts are files that are retained after a
job completes. By default there are no artifacts, but we could modify
our workflow so that the documentation is part of the artifacts.
 The good news is that
the documentation built without error. The bad news is that I can’t see
the documentation to ensure that it’s actually useful. Note in the above
image that there are three notes following our job: Status, Total
duration, and Artifacts. Artifacts are files that are retained after a
job completes. By default there are no artifacts, but we could modify
our workflow so that the documentation is part of the artifacts.  We can
click on the
 We can
click on the