Automation and Continuous Integration (on GitHub)
Last updated on 2026-02-26 | Edit this page
Estimated time: 180 minutes
Overview
Questions
- What is CI?
- How can I use GitHub to test my code?
- How do automatically build documentation?
Objectives
- Become familiar with GitHub actions
- Use a github action to test your code
- Use a github action to build documentation
Using GitHub to run your tests
In this lesson we’ll learn how to have all our tests run every time we push changes to GitHub. This is an example of a continuous integration (CI) workflow. CI workflows are available via third party services such as Travis-CI, which you can link to your GitHub, GitLab, or Bitbucket repositories to build, test, and report on your projects. For this lesson we’ll use GitHub actions to perform the testing.
GitHub actions
GitHub Actions makes it easy to automate all your software workflows, now with world-class CI/CD. Build, test, and deploy your code right from GitHub. Make code reviews, branch management, and issue triaging work the way you want. GitHub.com
GitHub actions can perform a large variety of automation of tasks, but for this lesson we will focus only on the ability to install our module and run the tests. All of the actions that are associated with your project are stored in text files within your project. This means that you can edit the actions locally and then push them like any other file.
The actions are stored in a special directory called
./github/workflows/, and the files are stored in the
.yml format.
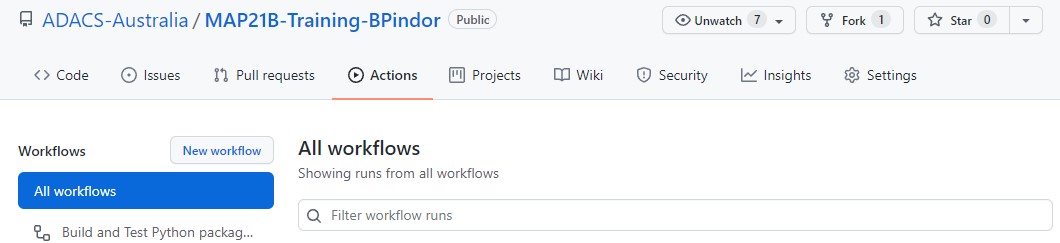
Creating a new action
To create a new action the easiest way is to use the Actions tab of
your GitHub repo, and select the New Workflow button.
The New workflow button will take you to a page to
choose a template from a long list. This list is semi-smart in that it
will look at the files that you have in your repository and suggest a
templates based on the language(s) that you are using. The first
template that shows up for our example repository is “Python
Package using Anaconda” which sounds like what we want so we’ll
start with that. Note that you can “set up a workflow yourself” using
the small link (this will begin with a blank workflow). Also note that
the templates are hosted in GitHub repositories so that you can browse
them and copy ideas from one to another. For the “Python Package
using Anaconda” the template is in the
actions/starter-workflows repository.

After selecting a template we’ll go to the online editor for
committing a new file on GitHub. The file
(./github/workflows/python-package-conda.yml) is currently
as follows:
YML
name: Python Package using Conda

on: [push]

jobs:
  build-linux:
    runs-on: ubuntu-latest
    strategy:
      max-parallel: 5

    steps:
    - uses: actions/checkout@v2
    - name: Set up Python 3.10
      uses: actions/setup-python@v2
      with:
        python-version: 3.10
    - name: Add conda to system path
      run: |
        # $CONDA is an environment variable pointing to the root of the miniconda directory
        echo $CONDA/bin >> $GITHUB_PATH
    - name: Install dependencies
      run: |
        conda env update --file environment.yml --name base
    - name: Lint with flake8
      run: |
        conda install flake8
        # stop the build if there are Python syntax errors or undefined names
        flake8 . --count --select=E9,F63,F7,F82 --show-source --statistics
        # exit-zero treats all errors as warnings. The GitHub editor is 127 chars wide
        flake8 . --count --exit-zero --max-complexity=10 --max-line-length=127 --statistics
    - name: Test with pytest
      run: |
        conda install pytest
        pytest
The first two lines give the name of the action which is
just for your own reference, and an on directive. The
on directive will trigger this action when
[push] happens. This is what we want.
The main part of the action is the jobs: section, which
can specify multiple jobs. Currently there is just one job with the name
build-linux. Within this job there are multiple
steps that are run.
The template is mostly good however:
- since this is the Anaconda template it uses conda for all the build/test. However Anaconda is slow to create new environments and install software;
- there is a bug in this template: the
python-versionshould be a string, not a float; - we don’t want to run the lint step.
We will replace conda with pip and can fix the other issues by updating the script to be as follows:
YML
name: Build and Test Python package using pip

on: [push]

jobs:
  build-linux:
    runs-on: ubuntu-latest
    strategy:
      max-parallel: 5

    steps:
    - uses: actions/checkout@v2
    - name: Set up Python "3.6"
      uses: actions/setup-python@v2
      with:
        python-version: "3.6"
    - name: Install dependencies
      run: |
        # upgrade pip
        python -m pip install --upgrade pip
        # install the testing requirements
        python -m pip install pytest pytest-cov
        # install the dependencies for this
        pip install -r requirements.txt
    - name: Install module
      run: |
        python -m pip install -e .
    - name: Test with pytest
      run: |
        pytest --cov=skysim --cov-report=term
Since we are now not using conda we should also change the name of
the script to be
./github/workflows/python-build-test-pip.yml before we save
it. Once we have made these changes and are happy we can press the green
“Start commit” button where we’ll be asked for a commit message, and
whether we want to commit to the main branch or to a new
branch. Lets commit directly to the main branch.
Once we make the commit the action will run. This is because
adding/changing a file via the GitHub webpage is considered the same as
a push action, which will trigger our workflow.
Viewing the progress/result of an action
To see what actions have been run and why, we navigate to the “Actions” tab. Here you’ll see all the actions that have ever been triggered for your repository, how they were triggered, what the status is, how long it took to run, and what artifacts (if any) were produced. Below is an example showing the completed action that we just created above.
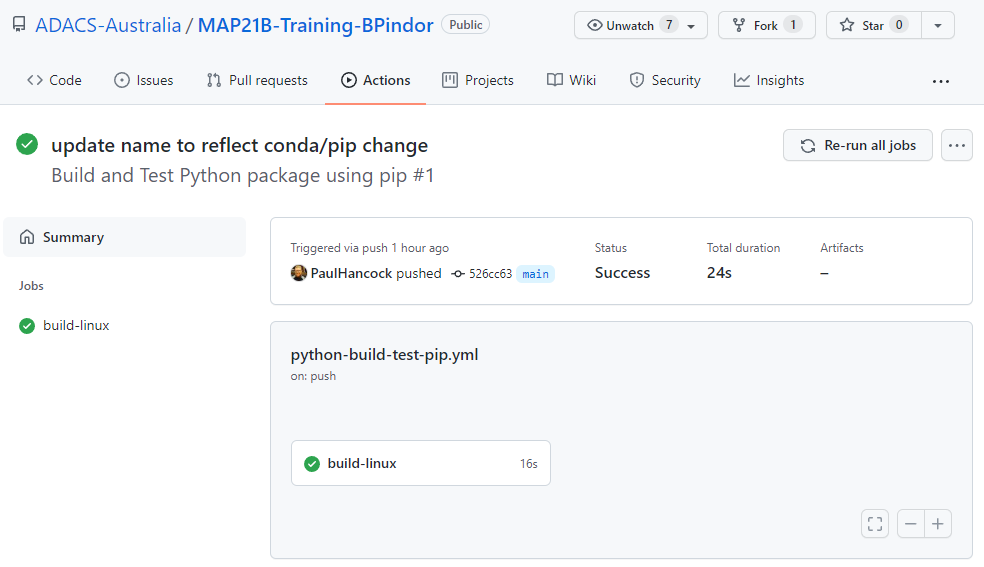
On the left, we see all the jobs that were part of this action, and on the right we have a summary for each. We want to see green ticks as this means that everything is ok. A red X will mean there was a problem somewhere. Either way we can click on one of the jobs to see the different steps of the job, and clicking the “>” next to a step will show all the details of that step. Below we can see the output of the “test with pytest” step.

If an action fails then the repository owner, and anyone watching the repository, will get a notification of the failure. When the action succeeds for the first time after a failure a notification will be sent, but if the action is a success following a success no further notifications will be sent. This means that you can push changes to your repo and you wont be bothered unless there is a problem.
Summary
We have seen how to setup a basic install-test workflow for a python project using a GitHub action. Once you have a working action you can extend it, create additional actions, or change how it triggers. See the documentation for more details and some examples.
Using GitHub to compile your documentation
In the previous lesson we learned how to use GitHub actions to build and test our python module. In this lesson we’ll learn how to compile our documentation with another GitHub action.
Creating a new workflow
To create a new action the easiest way is to use the
Actions tab of your GitHub repo, and select the
New Workflow button.
 The New workflow button will take you to a page to choose
a template from a long list. Last time we started with a pre-made
template for building and testing python code. This time we are going to
start with a generic template so we should click on the “set up a
workflow yourself ->” link.
We should see the following template appear under the file name of
.github/workflows/main.yml:
YML
# This is a basic workflow to help you get started with Actions

name: CI

# Controls when the workflow will run
on:
  # Triggers the workflow on push or pull request events but only for the main branch
  push:
    branches: [ main ]
  pull_request:
    branches: [ main ]

  # Allows you to run this workflow manually from the Actions tab
  workflow_dispatch:

# A workflow run is made up of one or more jobs that can run sequentially or in parallel
jobs:
  # This workflow contains a single job called "build"
  build:
    # The type of runner that the job will run on
    runs-on: ubuntu-latest

    # Steps represent a sequence of tasks that will be executed as part of the job
    steps:
      # Checks-out your repository under $GITHUB_WORKSPACE, so your job can access it
      - uses: actions/checkout@v2

      # Runs a single command using the runners shell
      - name: Run a one-line script
        run: echo Hello, world!

      # Runs a set of commands using the runners shell
      - name: Run a multi-line script
        run: |
          echo Add other actions to build,
          echo test, and deploy your project.
First up we should change the filename to something other than
main.yml and the name field to something other than
CI. The section that controls when the workflow is run is
maybe a little over-zealous but we can leave it for now. Finally, the
first step which uses actions/checkout@v2 is always useful
as it will check out our repository into the build environment. The
named steps after this are not currently useful so we should delete
them. We’ll replace these with a new step which does the documentation
build for us.
Using a template from the market place
Since we want to build our documentation using Sphinx, we can find a ready made solution in the GitHub marketplace. On the right panel we select the marketplace and search for Sphinx. The first result “Sphinx Build” looks like it does what we want so we’ll select that.
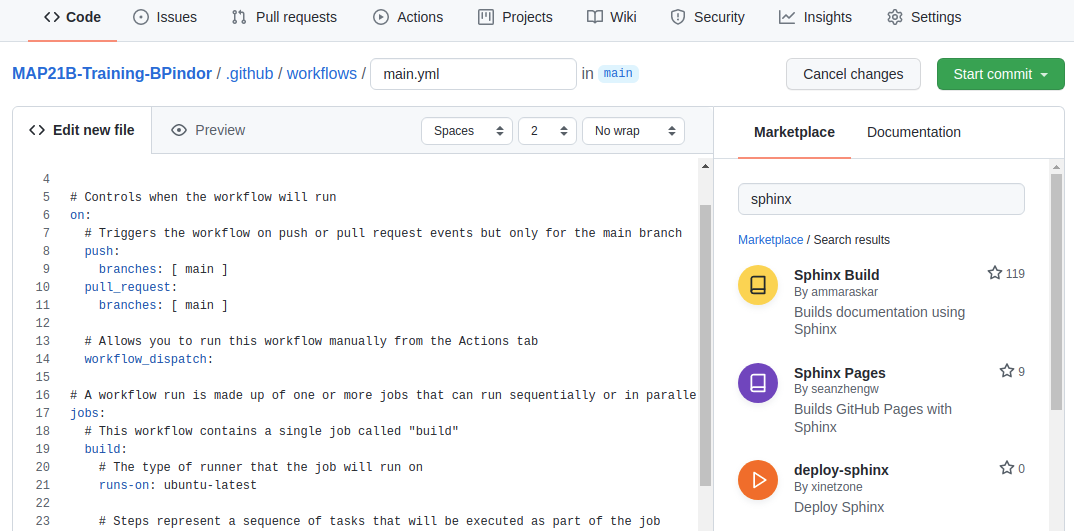  When
we click the “Sphinx Build” result we get the following snippet of code.
Which we can include in our workflow file.
 When
we click the “Sphinx Build” result we get the following snippet of code.
Which we can include in our workflow file.
YML
- name: Sphinx Build
  # You may pin to the exact commit or the version.
  # uses: ammaraskar/sphinx-action@8b4f60114d7fd1faeba1a712269168508d4750d2
  uses: ammaraskar/sphinx-action@0.4
  with:
    # The folder containing your sphinx docs.
    docs-folder: # default is docs/
    # The command used to build your documentation.
    build-command: # optional, default is make html
    # Run before the build command, you can use this to install system level dependencies, for example with "apt-get update -y && apt-get install -y perl"
    pre-build-command: # optional
To use the above template we make a new step called “Sphinx Build”
and copy the template into that step. As we do this we need to fill in
values for docs-folder and build-command. The
pre-build-command is optional and we wont use it so we can
either delete it or comment it out. Our step section now looks like
this:
YML
    # Steps represent a sequence of tasks that will be executed as part of the job
    steps:
      # Checks-out your repository under $GITHUB_WORKSPACE, so your job can access it
      - uses: actions/checkout@v2

      - name: Sphinx Build
        # You may pin to the exact commit or the version.
        uses: ammaraskar/sphinx-action@0.4
        with:
          # The folder containing your sphinx docs.
          docs-folder: docs/
          # The command used to build your documentation.
          build-command: make html
If we commit this file it will trigger all our on:push
workflows to trigger – both the build/test workflow that we created
earlier, and this documentation workflow. For my example I used the name
“Documentation with Sphinx” for the workflow, and when it completes I
see the following output.
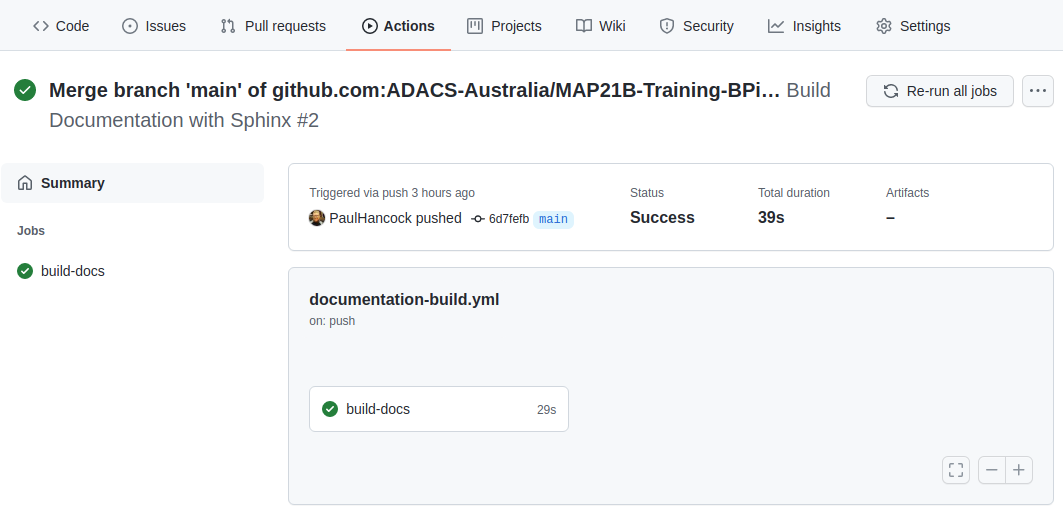  The good news is that
the documentation built without error. The bad news is that I can’t see
the documentation to ensure that it’s actually useful. Note in the above
image that there are three notes following our job: Status, Total
duration, and Artifacts. Artifacts are files that are retained after a
job completes. By default there are no artifacts, but we could modify
our workflow so that the documentation is part of the artifacts.
 The good news is that
the documentation built without error. The bad news is that I can’t see
the documentation to ensure that it’s actually useful. Note in the above
image that there are three notes following our job: Status, Total
duration, and Artifacts. Artifacts are files that are retained after a
job completes. By default there are no artifacts, but we could modify
our workflow so that the documentation is part of the artifacts.
Saving the documentation
To save the documentation that was built we need to let the GitHub workflow know that the documentation should be considered an artefact of the build. The advanced guide for GitHub actions demonstrates how to do this using another pre-made recipe which is as follows:
YML
  - name: 'Upload Artifact'
    uses: actions/upload-artifact@v2
    with:
      name: my-artifact
      path: my_file.txt
For us we want the artifact to be a directory docs/build/ and we’ll give it a name of documentation-html.
Our full workflow for this lesson now looks like this:
YML
# This is a basic workflow to help you get started with Actions

name: Build Documentation with Sphinx

# Controls when the workflow will run
on:
  # Triggers the workflow on push or pull request events but only for the main branch
  push:
    branches: [ main ]
  pull_request:
    branches: [ main ]

  # Allows you to run this workflow manually from the Actions tab
  workflow_dispatch:

# A workflow run is made up of one or more jobs that can run sequentially or in parallel
jobs:
  # This workflow contains a single job called "build"
  build-docs:
    # The type of runner that the job will run on
    runs-on: ubuntu-latest

    # Steps represent a sequence of tasks that will be executed as part of the job
    steps:
      # Checks-out your repository under $GITHUB_WORKSPACE, so your job can access it
      - uses: actions/checkout@v2

      - name: Sphinx Build
        # You may pin to the exact commit or the version.
        uses: ammaraskar/sphinx-action@0.4
        with:
          # The folder containing your sphinx docs.
          docs-folder: docs/
          # The command used to build your documentation.
          build-command: make html

      - name: Archive documentation
        uses: actions/upload-artifact@v2
        with:
          name: documentation-html
          path: docs/build/
If we save and wait for the triggered workflow to complete we should see that the artifacts field is now 1, and that there is a new section on our page which shows all the artifacts that were produced.
  We can
click on the
 We can
click on the documentation-html link to get a zip of the
docs/build/ directory which contains all our
documentation.
Summary
Building documentation requires a similar workflow to building and testing code.
The GitHub marketplace offers a variety of pre-made ‘steps’ to include in your workflow. There are many that will let you build documentation with Sphinx.
When building documentation we need to ensure that the documentation that was built is considered part of the workflow ‘artifact’ so that we can download and view it after the workflow completes.
SOLO Activity: GitHub actions
In this activity you will apply the previous lessons to automate the documentation and testing using GitHub actions. This activity can be completed on your own solo project, or as part of a group project. The requirements are that the project has a python module that can be installed, has at least one function with a docstring, and at least one test function.
- For your software project create a GitHub action that will build and
test your python module.
- “Build” in this case means install the required dependencies and then install your module using pip install -e .
- The test phase can be carried out using either a test suite such as pytest, or by running your test script directly. If you are using a personal test script then you should ensure that it will exit with status != 0 when the tests fail, so that the build/test workflow will also report a failure.
- Use the GitHub online editor to create/modify the relevant .yml files and set on status to be push so that the workflow will run each time that you make changes to the .yml file.
- Once you have a working build/test workflow, create a documentation workflow.
- Use the build/test workflow as a template and remove the test phase and replace it with a documentation build.
- Modify the documentation step such that it will produce an artefact which is the contents of the documentation directory.
- Verify that your documentation has completed properly by downloading and viewing the workflow artefact.