Containers
Overview
Teaching: 80 min
Exercises: 40 minQuestions
What are containers?
What is the difference between Docker and Singularity?
How can I build containers?
How can I share containers?
Objectives
Download a container
Build a simple container
Convert a docker container to a singularity container
Some of the content for this lesson is derived from the Coding Best Practices workshop that was run by ADACS. Additional information and background can be found in the intro lessons of that workshop.
Goal
There are two main goals that we hope to achieve by using containers:
- Reproducibility, and
- Portability.
That is: given the same inputs, we want our workflow to produce the same outputs, on any computer, now and forever. Anyone who has tried to run their workflow on multiple computers, upgrade their OS, or help a colleague to use your workflow, will no doubt understand just how hard this is.

Containers
Containerization is a way to bundle your software in such a way that you no longer have to deal with complex dependency chains, supporting multiple OSs, or software version conflicts. Containers provide a way to package software in an isolated environment which may even have a different operating system from the host.
Containers are different from virtual machines (VMs) in a few key ways. Using a virtual machine is like running your operating system on virtualized (think “simulated”) hardware. A VM will then run a guest operating system on this hardware, and thus needs all of the resources that an OS would need. A VM will additionally contain all the software that you want to run within the guest operating system. A container works by virtualizing the operating system instead of the hardware. Thus a container doesn’t need an entire operating system worth of data/config, but only the software that you want to run within that operating system. A virtual machine will typically persist state/data between runs (for better or worse), whilst a container will not. Each time you run a container you get that new car smell.
The two most popular containerization systems are Singularity/Apptainer and Docker. Docker is primarily used on computers where you have root access such as your laptop/desktop or a compute node in the cloud. HPC facilities will not use Docker as it provides root access to the host system, and instead will use Singularity which does not.
The two systems are largely interoperable - you can build a Docker container on your desktop, test it out in your workflow, and then convert it to a Singularity image for use on your HPC facility of choice. You can think of a container as a self contained operating system which you can build with all the software that you need, which you can then deploy on any computer that you like. In fact you don’t even need to know how to build the containers to use them as there are many available pre-built containers that you can use. Both systems provide an online repository for storing built containers: Docker has DockerHub, while Singularity uses Singularity Container Services (SCS).
![]() Docker is easy to build, and can use on any computer where you have root access.
Docker has clients for Linux, Windows, and MacOS, so it meets our portability requirement with ease.
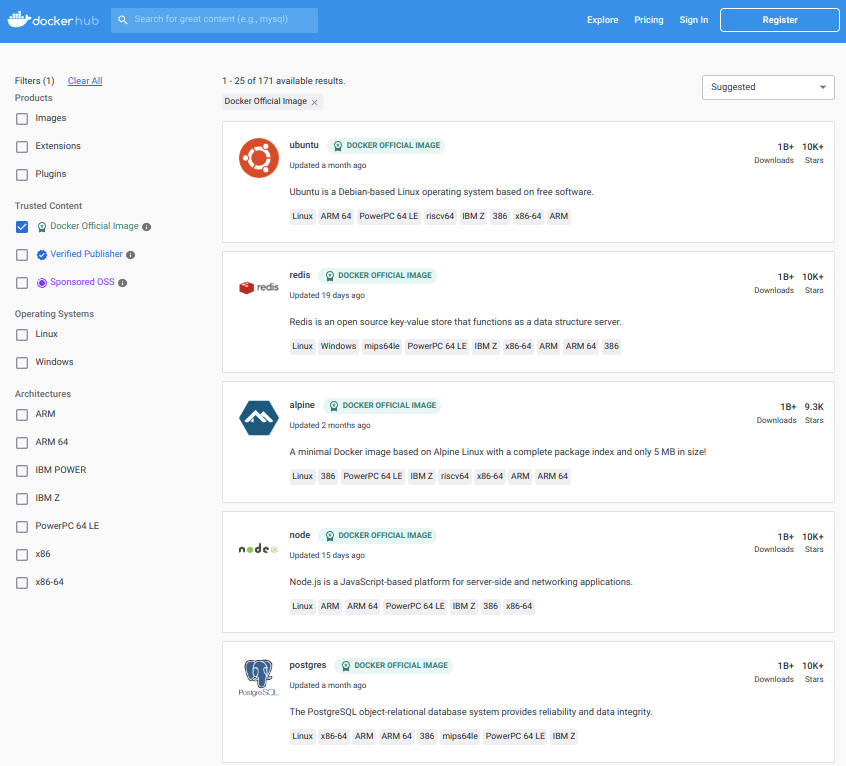
There are a large number of ready made containers that you can use as a starting point for your own container, available on docker hub.
Often you don’t even need to make your own container, you can just use an existing one right out of the box.
Docker requires that you have a docker service running to manage all the images.
Docker is easy to build, and can use on any computer where you have root access.
Docker has clients for Linux, Windows, and MacOS, so it meets our portability requirement with ease.
There are a large number of ready made containers that you can use as a starting point for your own container, available on docker hub.
Often you don’t even need to make your own container, you can just use an existing one right out of the box.
Docker requires that you have a docker service running to manage all the images.
 Singularity easy to use and doesn’t require root access, but it’s only available for Linux based machines.
Singularity images are stored as files which you can easily move from one system/location to another, and you don’t need a service to be running in order to use the images.
Singularity easy to use and doesn’t require root access, but it’s only available for Linux based machines.
Singularity images are stored as files which you can easily move from one system/location to another, and you don’t need a service to be running in order to use the images.
Our recommendation is to use both of these solutions in conjunction: Docker to build/test/run containers on your local machine, and then Singularity to run containers on an HPC. A really convenient feature of the two systems is that Docker containers can be converted into Singularity containers with minimal effort. In fact, some smart cookie created a docker container, with singularity installed within, that will automatically convert your docker containers into singularity containers. Therefore you don’t even need to install Singularity on your local machine in order to produce singularity images.
Using containers
There are a large range of pre-built containers available on docker-hub. These range from base operating systems like Ubuntu, Alpine, or Debian to application containers like redis, postgres or mysql, to language containers like python, java, or golang. There is even a docker container for docker itself!
We will begin our journey by working with the “Hello World” docker container.
Say hello world with docker
$ docker run hello-worldSolution
Unable to find image 'hello-world:latest' locally
latest: Pulling from library/hello-world
2db29710123e: Pull complete
Digest: sha256:62af9efd515a25f84961b70f973a798d2eca956b1b2b026d0a4a63a3b0b6a3f2
Status: Downloaded newer image for hello-world:latest

Hello from Docker!
This message shows that your installation appears to be working correctly.

To generate this message, Docker took the following steps:
 1. The Docker client contacted the Docker daemon.
 2. The Docker daemon pulled the "hello-world" image from the Docker Hub.
    (amd64)
 3. The Docker daemon created a new container from that image which runs the
    executable that produces the output you are currently reading.
 4. The Docker daemon streamed that output to the Docker client, which sent it
    to your terminal.

To try something more ambitious, you can run an Ubuntu container with:
 $ docker run -it ubuntu bash

Share images, automate workflows, and more with a free Docker ID:
 https://hub.docker.com/

For more examples and ideas, visit:
 https://docs.docker.com/get-started/
The hello-world container is very minimal and does only one thing.
We can be more adventurous and do interactive things with containers.
Let’s start with the ubuntu container, which contains a naked install of Ubuntu.
bash the container
$ docker run -it ubuntu bashExplore the container system, look at what software/libraries are available.
Solution
Unable to find image 'ubuntu:latest' locally
latest: Pulling from library/ubuntu
cf92e523b49e: Pull complete
Digest: sha256:35fb073f9e56eb84041b0745cb714eff0f7b225ea9e024f703cab56aaa5c7720
Status: Downloaded newer image for ubuntu:latest
root@f13326d08c8a:/#
When we called docker run above we specified the -it options which are short for --interactive and --tty which means that we’ll get an interactive container and a tty (shell-like) interface.
By calling the container name ubuntu followed by the command bash we will run the bash command within the container.
You’ll see that your command line changes to something like root@1234abc:/#.
If you run a command like apt list or ls /usr/bin you’ll see software/libraries that are available to you.
This ubuntu install is quite minimal and doesn’t include any desktop features (it’s not a VM!).
When we are working within a container we should be mindful that the contents of the container are ephemeral.
If we change any of the container contents while it’s running, these changes will be lost when the container shuts down.
So whilst you could run the ubuntu container, install some software you wanted, and then run that software, you would need to reinstall it every time you ran the container.
We’ll see how to build containers with the software that we require in the next section.
Containers are setup to be isolated from the host operating system, so that whilst you are within a container (eg you are running docker -it ubuntu bash) you cannot see files or run programs from the host operating system.
Any accidental/nefarious things you do within the container are “safe”.
However, if you have a script that you want to run, let’s call it do_things.py, and you want it to run with the version of Python inside a docker container you need to find some way to get that script from your local machine into the container.
There are two ways to go about this:
- You can copy a file from your local machine into a (running) docker container using
docker cp [OPTIONS] CONTAINER:SRC_PATH DEST_PATH - You can mount part of your local file system to a location within the container using
docker run --mount [OPTIONS] CONTAINER
The first option can also be used to copy files from the container to your local machine.
The second option is often best when you are developing code that needs to run within the container because you can use your favorite IDE on your local machine to work on the files, and then run them within the container without having to constantly copy things back and forth.
Mount a local directory into your container
On your machine,
toucha new file calleddo_things.pyand add the following:#! /usr/bin/env python import socket print(f"Hello from {socket.gethostname()}")Now run:
docker run -it --mount type=bind,source="$(pwd)",target=/app python:3.8.5 bashNavigate to the
/appdirectory and runpython do_things.py
In the above exercise you should see that the host name is some random string of letters and numbers, which is (hopefully) different from your local machines name.
Note that when we are working inside the container we are working as root, which means we have all the privileges.
If you bind a local path to one inside the container, then you’ll have root access to that path.
So it’s a good idea not to mount / inside the container!
Being root user inside the container also means that any files which you create in the mounted directory will be owned by root on your local machine.
Having root privileges within the container is a big reason why you wont see docker being provided on an HPC.
Managing containers
Docker will keep all your images and containers organized for you but in a little bit of a hidden way.
To see the images that you have available use docker images.
And you’ll get a listing similar to below:
$ docker images
REPOSITORY                           TAG       IMAGE ID       CREATED         SIZE
test                                 latest    98ba6115a75f   3 weeks ago     882MB
ubuntu                               latest    216c552ea5ba   5 weeks ago     77.8MB
python                               3.9       4819be0df942   8 months ago    912MB
hello-world                          latest    feb5d9fea6a5   13 months ago   13.3kB
python                               3.8.5     28a4c88cdbbf   2 years ago     882MB
The REPOSITORY:TAG is how you can refer to a particular version of a container.
You can also use the IMAGE ID locally to refer to a container.
Note the different sizes of the containers: hello-world is tiny because it does only one thing, ubuntu is 78MB and is the bare-bones you need to run ubuntu, but then python:3.9 is nearly 1GB as it has a lot of different software installed within.
These are just the containers that you have locally, and they may not be running.
To see the running containers you can use docker ps which will show the containers that are running.
If this is your first time running Docker containers then you’ll probably have no running containers, however sometimes you’ll run a container in detached mode (with docker run -d) which lets the container sit in the background and provide a service (usually some API or web site or a db connection).
It’s easy to forget about these running containers, so an occasional docker ps can show you what is running.
If you want to stop a container you can find it’s CONTAINER ID (not image id) from docker ps and then run docker stop <id>.
Managing docker containers (and networks and volumes) can be tricky, and usually people use a manager such as docker compose, to define container interactions and set up networks etc. We will not get further into managing container because, you guessed it, NextFlow can do this for us.
Building (docker) containers
As well as using pre-made containers, you can build your own. Whilst it’s possible to build a container from scratch, it’s recommended that you start with a base layer and then add in what you need. In many ways, building a container is like installing software on your computer, except that you don’t have an interactive prompt. If you can install software on your computer from the command line then you can build a docker container.
A few things to note:
- Containers are built in layers, with each layer being a container of it’s own.
- It is often best to start with a container that does most of what you want rather than something “empty” like
Ubuntu. - Whatever files you put into the container during the build process will remain there during deployment.
Docker containers are built according to instructions in a Dockerfile.
Below is an example docker file which is used to build a container for a project called Robbie:
# Start with a container that already has Python v3.9 installed
FROM python:3.9

# Set some meta-data about this container
LABEL maintainer="Paul Hancock <paul.hancock@curtin.edu.au>"

# install non-python dependencies
RUN apt update && \
    apt install -y openjdk-11-jdk swarp && \
    apt-get autoremove -y && \ # autoremove and clean will get rid of not-needed libraries and reduce the container size (a bit)
    apt-get clean

# download a java library and make a wrapper script for it
RUN cd /usr/local/lib && wget http://www.star.bris.ac.uk/~mbt/stilts/stilts.jar && \
    cd /usr/local/bin && echo 'java -jar /usr/local/lib/stilts.jar "$@"' > /usr/local/bin/stilts && chmod ugo+x /usr/local/bin/stilts

# work in this directory
WORKDIR /tmp/build

# add files from the current directory in to the build directory (all the files for the Robbie library)
ADD . /tmp/build

# install python dependencies, with specific versions specified for longevity, and Robbie scripts
# using pip install . will break the shebang lines of some scripts so stick with python setup.py install
RUN pip install -r requirements.txt && \
    python setup.py install && \
    rm -rf /tmp/build

# set the home directory to be /tmp so that we get fewer warnings from python libraries like matplotlib or astropy.
ENV HOME=/tmp
Note the following from the above:
- We use
apt install -yto get around the interactive questions thataptwould normally ask us (answer “yes” to all questions) - We use the
&&to string multiple commands together so that we reduce the number ofRUNstatements that we need. This reduces the number of layers that are created. - We use the line continuation
\after&&to make the file easier to read - Each of the layers created have a different use: one for ‘system’ libraries, one for the java library, and one for all the python code.
- We have put the layer that is most likely to change last so that when we remake this container we can make use of previously created layers.
To build the above container we run the following:
$ docker build -t robbie:new .
...
Where we used robbie as the container name and new as the tag.
Typically people use either a version number (eg, v1.0) or latest as the tag, but any string will be accepted.
If you have docker installed on your computer you can run the following exercise there. If you don’t have docker then you can run docker using play with docker (free registration required).
Using play-with-docker
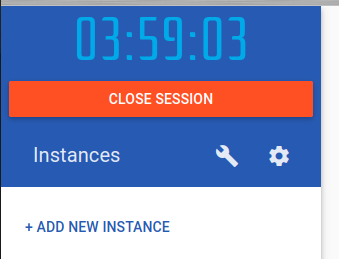
- Sign in to play with docker
- Click on the “Add new instance link”
- Use the
vimeditor to create a file calledDockerfile- Follow the instructions below
Let’s build a container
Create a
Dockerfilewhich will generate a container with this recipe:
- use python:3.8.5 as the base layer
- git clone my repo from another workshop (we use https address to avoid ssh failures)
- install
mymodulewith pip- set the default
WORKDIRto be/appSolution
# use a pre-made container as base
FROM python:3.8.5

# download the file into /user/bin and change permissions
RUN cd /tmp &&\
    git clone https://github.com/PaulHancock/symmetrical-octo-parakeet.git &&\
    cd symmetrical-octo-parakeet && pip install .

# set the default work directory
WORKDIR /app
Build and run your container
Build like this:
$ docker build -t test:latest .Run it like this:
$ docker run test sky_sim.py
Get the outputs from the container
The
sky_sim.pyscript prints to STDOUT when run, but will also save the output to a file calledcatalog.csvTo access this file we need to bind our local directory to the working directory (/app) within the container.Run
sky_sim.pyfrom within thetestcontainer using the appropriate binding and view the output file.Solution
$ docker run --mount type=bind,source="$(pwd)",target=/app test sky_sim.py
$ head output.txt
id,ra,dec 0000000, 15.057292, 40.908259 0000001, 14.577034, 42.077796 0000002, 14.072312, 40.717162 0000003, 15.194828, 41.930678 0000004, 13.545137, 40.823356 0000005, 14.399253, 40.782598 0000006, 14.195131, 42.081639 0000007, 13.764496, 40.293573 0000008, 13.518799, 41.389172
Managing all the binding and container selection can be a bit annoying so you might want to create some shortcuts or aliases for yourself. If you are using a container within a bash script then you can set/use a variable to help you out:
# setup the container run command once
container='docker run --mount type=bind,source="$(pwd)",target=/app test'

# ... later on you can use it easily and without making the script hard to read
${container} sky_sim.py
Or you might create a bash alias for general use on your command line:
alias container='docker run --mount type=bind,source="$(pwd)",target=/app test'
So now we know how to make and run a Docker container. This will work fine on your local computer, but not on an HPC. HPC systems will not (should not) give you root access to anything, which means you can’t use Docker (it requires root access). Instead you’ll use singularity/apptainer instead.
Making a singularity image
Making singularity containers can be done in much the same way as with Docker (see here for info). However, rather than re-learning all the above for singularity, we can do some rather nice containerization use to convert our docker containers into Singularity images.
The following docker command will load a docker image (identified by [image:tag]) within which singularity has been installed.
It will create a binding/mount for the docker socket so that singularity within the container can talk to the docker damon running on the host machine.
Finally, it will run singularity to convert the existing docker container into a singularity container, saving it in /output (which is bound to a directory on your host machine [destination dir]).
docker run \
-v /var/run/docker.sock:/var/run/docker.sock \
-v [destination dir]:/output \
--privileged -t --rm \
singularityware/docker2singularity \
[image:tag]
The singularity image file (.sif or .img) that you create with the above command is a portable format that you can move to other machines without having to remake or rebuild.
This means that you can create docker images on your local machine, test and develop until you get things just right, and then use them to create a singularity image which you can copy to an HPC for use by you and others.
Make a singularity container
Create a singularity container called
test.sifusing the above syntax.Solution
docker run \
-v /var/run/docker.sock:/var/run/docker.sock \
-v $(pwd)/test:/output \
--privileged -t --rm \
singularityware/docker2singularity \
test:latest
This will pull a new image to your machine the first time you run it.
Image Format: squashfs
Docker Image: test:latest

Inspected Size: 974 MB

(1/10) Creating a build sandbox...
(2/10) Exporting filesystem...
(3/10) Creating labels...
(4/10) Adding run script...
(5/10) Setting ENV variables...
(6/10) Adding mount points...
(7/10) Fixing permissions...
(8/10) Stopping and removing the container...
(9/10) Building squashfs container...
INFO:    Starting build...
INFO:    Creating SIF file...
INFO:    Build complete: /tmp/test_latest-2023-06-06-806deabcb504.simg
(10/10) Moving the image to the output folder...
    306,089,984 100%  368.07MB/s    0:00:00 (xfr#1, to-chk=0/1)
Final Size: 292MB
Note the name of the image will be
test_latest-2023-06-06-806deabcb504.simgwhich you can rename.sudo chown ${USER} -R test mv test/[long name].simg test.sif
play-with-docker note
If you see this image:
This is normal. I can’t figure out how to make singularity containers on play with docker without breaking some internal file system limit.
Running singularity containers
Running a singularity container is much like running a docker container, however instead of using the image name:tag, you can link directly to the image file.
singularity run [run options] [image path] [args]
Where [run options] are options for singularity run command, and [args] are arguments to the script which is run within the container.
Singularity supports binding files/directories within the container to locations on the host machine, using the --bind or -B flag.
Singularity offers multiple ways to interact with a container:
- run - launch container an run a predefined script
- exec - launch container with custom commands (eg
sky_sim.pyorpython my_other_script.py) - shell - drops you into an interactive shell within the container (similar to exec with
/usr/bin/bashas args)
Run your singularity image
- If you have built a
test.sifimage, copy yourtest.siffile to your HPC of choice (NCI/OzStar/Pawsey)- Login to said HPC
- Use
module loadto loadsingularity/apptainer- Try the singularity run/exec/shell commands on your container
Example on ozstar
scp test.sif ozstar:/fred/oz983/phancock/.
ssh ozstar
module load apptainer/latest
singularity exec -B $PWD:/home/phancock test.sif sky_sim.py
Wrote catalog.csvIf we run
lsthen you should see thecatalog.csvfile in the local directory.singularity shell test.sifWill give me an interactive terminal that looks like this:
Singularity>
Advanced container considerations
Two things to consider when building containers:
- ease of use
- ease of development
Having a single container that has all of your software and dependencies is convenient for deployment as you have a one-size-fits-all container. However, during development, you’ll often need to change your software and possibly update dependencies. Having to rebuild your container every time you change your software can be a massive time sink. For software that is still under active development, it is often preferable to build a container that contains all the dependencies, but keep your own code on your local machine. When you invoke your code you can bind your working directory to some place within the container and then run your code from there. This will drastically reduce the try/test cycle of your development. When your code becomes stable you can then move it into the container.
Related to the above are questions about how much software/data needs to live in each container. For the most part it is a good idea to store as little data inside a container as possible.
Options include:
- building multiple containers, one for each of the different pieces of software that you need
- building a monolithic container that contains all the software you want
A middle ground is sensible:
- group software into common requirements and use one container per group
If your workflow relies on a bunch of python code and your various scripts require a common or overlapping set of modules then build one “python” container which contains all of these requirements. This will likely mean that you have one ~1-2GB python container which can be used for all of your scripts.
Example setup for a project:
- a container for java based applications
- a container for python based applications
- a container for 3rd party C/C++ applications which have some complicated build requirements
- a container for tensorflow which can use GPUs
If you have multiple pieces of software that need to communicate with each other then running them in separate containers will add an orchestration overhead that you probably don’t want. NextFlow can easily run a process within a given container, but specifying multiple containers for a single process isn’t possible. To get around this you’ll either need to create a single container that contains everything you need for a single process, or break the process into multiple parts.
You can create a container and define an entrypoint so that you are able to call the container as if were just an application. This micro-service type model can work well, especially if the inputs/outputs are text based.
How containers work together
Containers make it very easy yo create a set of independent but related services that communicate with each other via an api. This approach is called micro-services and is common for projects that are creating a web application.
A web app would have containers such as:
- A database to store data
- An environment for running custom code (e.g. some machine learning models)
- An ORM such as DJango that connects the database and the custom code and presents it to the user
- A web service such as nginx that passes user requests to DJango and serves pages to the user
Getting the containers to talk to each other is then managed by specifying which containers are connected to which, and what ports they are using to communicate. Docker-compose is a common solution that allows you to specify these connections in a configuration file. In the above example all the containers would be running persistently waiting for user input. Such a configuration is often not required for scientific workflows.
Key Points
Containers improve portability and reproducibility
You can download and share containers with dockerhub
Building docker containers uses similar commands to installing software on your computer